Very Simple Data Entry with C# Winforms & Datasets
I recently needed to generate a quick and dirty app for data entry into a normalized database. I’ve done this sort of thing in Access before so started to play with it a little. After getting one table’s lookup almost done, I decided to try out a very quick Winform instead. It’s not a solution I’d recommend for production use, but worked for my purposes.
I figured I’d share in case anyone needed something quick, but not necessarily great-looking for some data entry work. This follows the “to learn something, have a small starting goal, learn what you need for that goal, then continue” pattern. That involved Creating a winform, Connecting to a DB, displaying that data, and being able to edit that data, as well as gracefully launching and closing windows.
The end result is one form per table that I needed to use, with some lookups. The forms are basic data grids so you can see all data on one page. You can add controls to make things prettier, but that’s way beyond the scope of this project.
This assumes you have a copy of AdventureWorks to reference and a copy of C#.
I would not recommend trying this against a table with a large number of rows. We don’t place any limits on our tables when fetching data in this basic app. (That might come in a future project.)
Start by creating a new Winforms project.
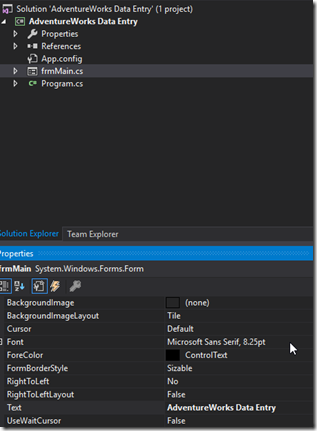
I renamed my main form to “frmMain” and changed the title (name) to “AdventureWorks Data Entry”.
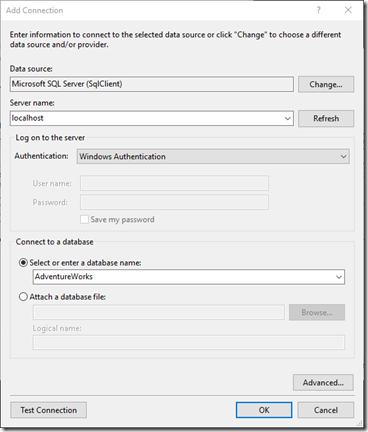
Now we’re going to Add a New Data Source in the “Data Sources” toolbox. (If this isn’t visible, show it using the “View” menu, “Other Windows”.) There should be a simple “Add New Data Source” link. Click that or the button at the top of the Data Sources toolbox. We’re going to choose “Database”, click “Next”, then “Dataset”, and click “Next”. Choose the “SQL Server” option and browse for your server/database. I’m using my local machine and local AdventureWorks database.
Hit “OK” and click through the dialog to save the Connection. I’m just using the default name of “AdventureworksConnectionString”.
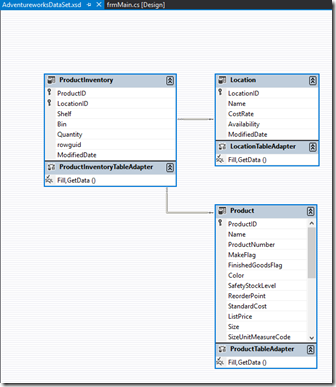
Your next screen will ask which objects you want to include. For our purposes, we’re going to keep the dataset very simple. I’m choosing the “Production.ProductInventory”, “Production.Location”, and “Production.Product” tables. We’re going to concentrate on maintaining the Inventory for our example. Select the “Location”, “Product”, and “ProductInventory” tables and click OK.
You should now have a new “AdventureworksDataSet.xsd” file if you chose the defaults. Double-click that as we might want to tweak some settings.
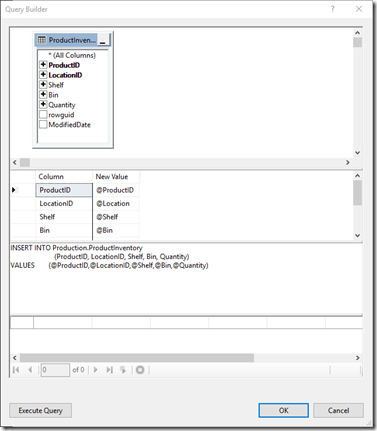
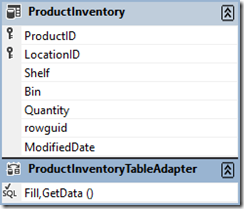
In this case, the “rowguid” and “ModifiedDate” columns for ProductInventory have defaults. We want to use those when we add new rows. Click the “ProductInventoryTableAdapter” in the dataset window. That will change your “Properties” window. We want to edit the “InsertCommand CommandText” property by clicking the ellipsis (…) next to the “INSERT INTO” statement. This will bring up a window familiar to many of us. Expand or move the screens around as needed until you can see the “rowguid” and “ModifiedDate” columns. De-select those. This will prevent the code from attempting to insert values into those columns. Hit OK.
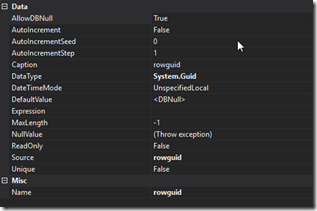
Now click on the rowguid column in the dataset view. This should allow you to edit the Properties of the column. We want to set “AllowDBNull” to “True”.
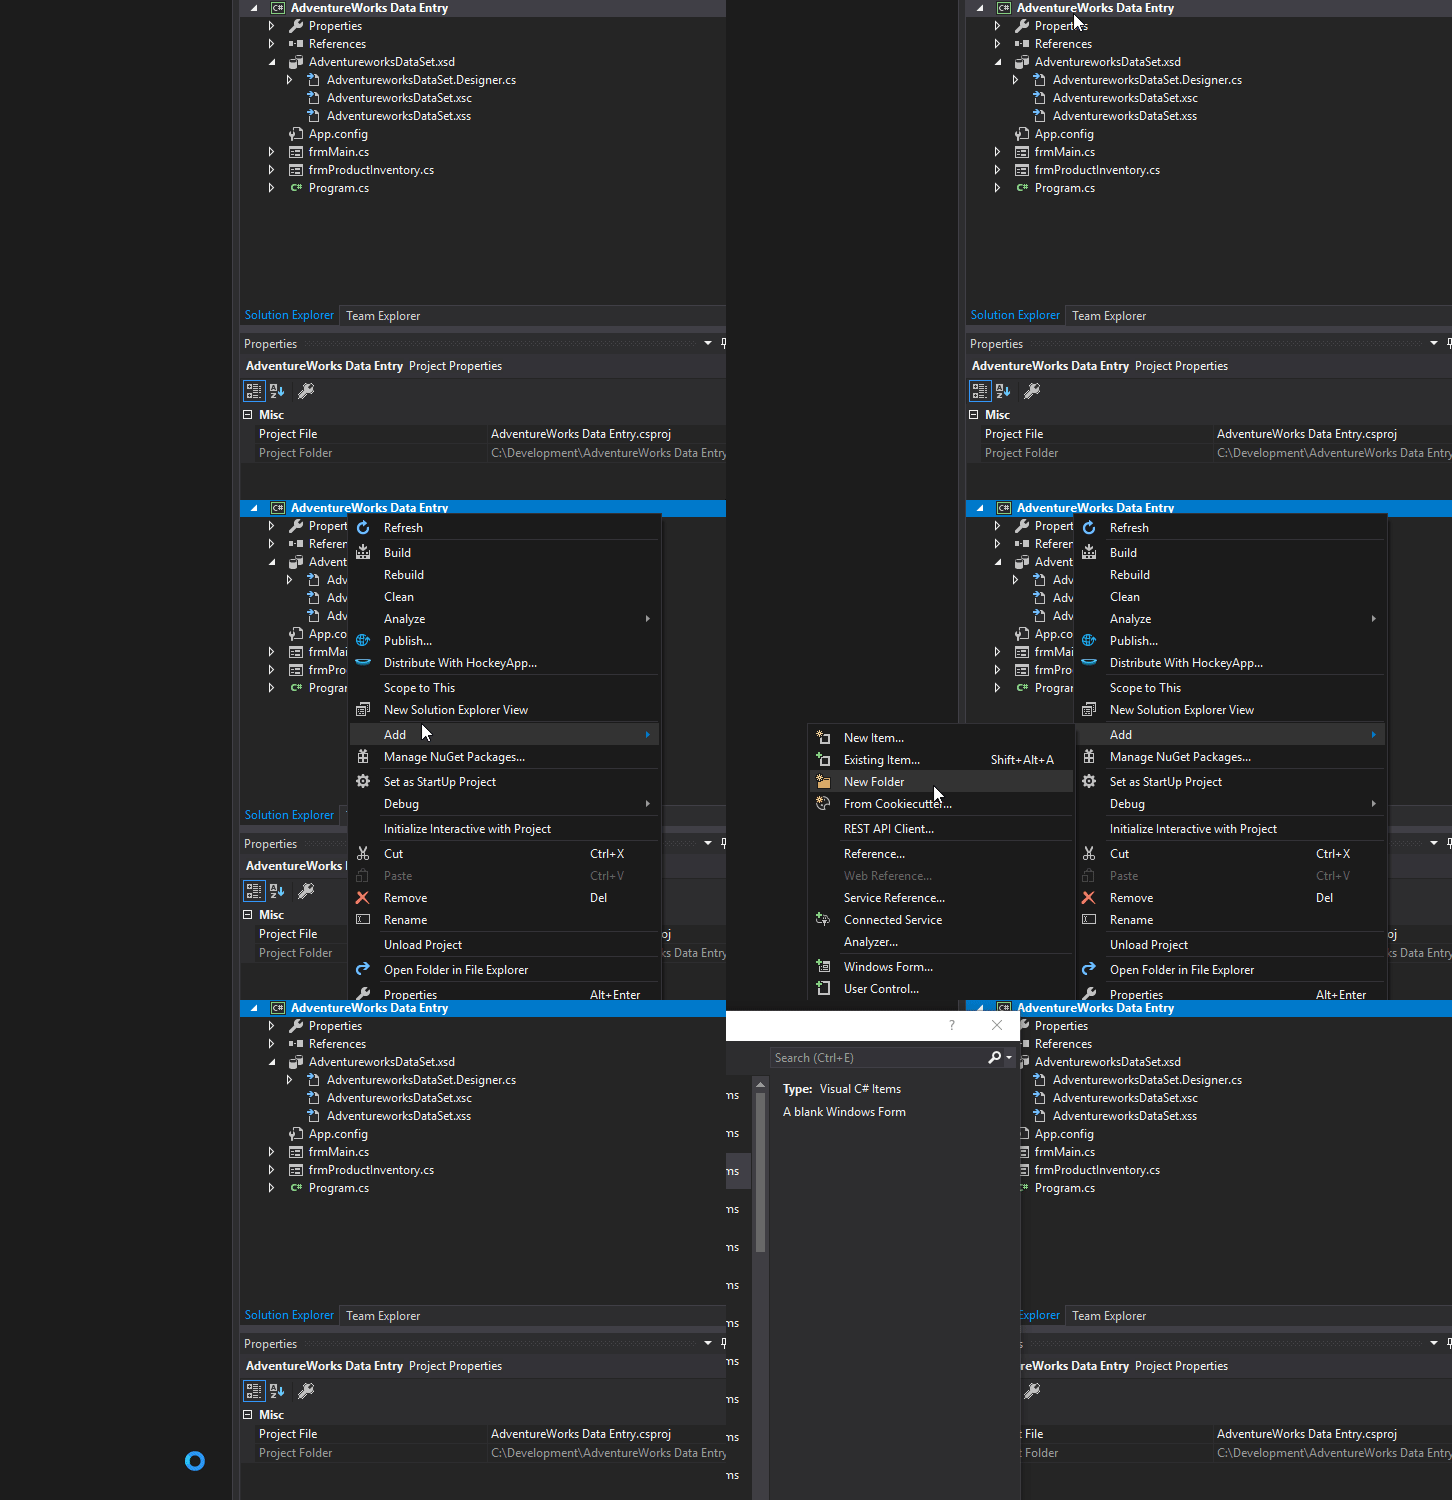
Do the same for “ModifiedDate” and then Save All. We’re now ready to add our Product Inventory form. Go to your Solution Explorer, right-click the Project and select “Add” then “Windows Form”. I’m choosing to call mine “frmProductInventory”.
With your new Windows form, go to the Properties panel, Appearance section, and change the “Text” property to “Product Inventory”.
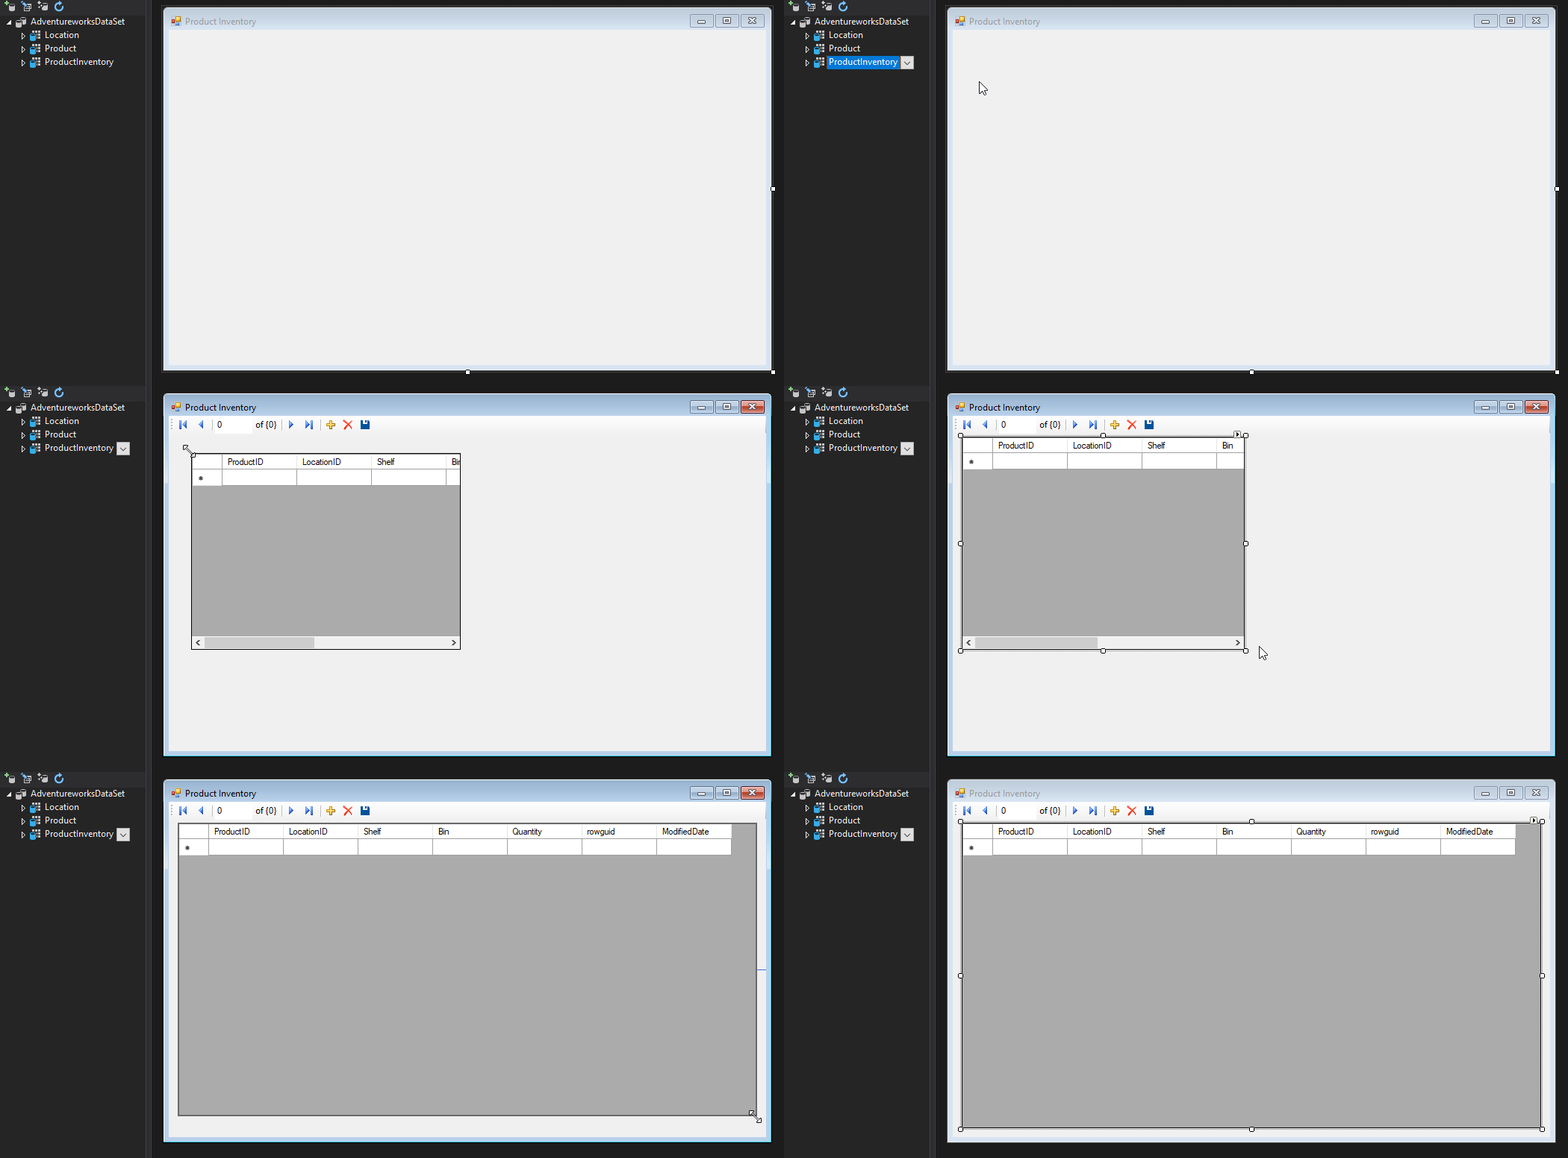
Now we’re going to make sure the “Data Sources” toolbox is open. I pinned it so it would be visible. From the “AdventureworksDataSet”, we’re going to simply drag out the “ProductInventory” table to the Product Inventory windows form. I’ve also resized it to have anchoring at the edges of the form. We’ll set those in a little bit to ensure the grid resizes with the window.
Now, select the grid within the form, go to the Properties panel, scroll all the way down and look for the Layout – Anchor property. We’re going to change that to “Top, Bottom, Left, Right”.
We don’t want the users to add data in the “rowguid” or “ModifiedDate” columns, so let’s remove those from the grid to avoid any confusion. Right-click the grid and select “Edit Columns”, then highlight each column and click “Remove”, one at a time. Click OK when done and you’ll see that the columns are no longer present in the grid.
Now we want our users to easily be able to access the Product and Location values rather than trying to remember the underlying IDs. For that, we’ll need to edit the columns again, change the Column Types for those to a Combo Box, and lookup data in the appropriate tables. While we’re at it, we’ll change the visible names to just “Product” and “Location”.
- Edit Columns
- Change the HeaderText from “ProductID” to “Product”
- Change the ColumnType to “DataGridViewComboBoxColumn”
- Change the DataSource to the “Product” table by drilling through the Other Data Sources
- Set the DisplayMember to “Name”
- Set the ValueMember to “ProductID”
- Optionally adjust the size of the columns. I’ve set mine to 150 minimum, with the AutoSizeMode set to “AllCells”
Repeat for the “LocationID” column, but using the Location table.
For our last step, we need a way to make this form visible. Let’s switch over to our “frmMain” form. (Re-open it, if you closed it.) We’re going to add two “Button” controls from the “Common Controls” area in the main Toolbox. Just drag them onto the form. I resized the form as well to make it a bit smaller as we’ll just have two buttons on it.
Select “button1” and change its Text property to “Product Inventory”. Change its Name to “btnProductInventory”. Resize the button so all text shows.
Select “button2” and change its Text property to “E&xit”. (This will allow for a hotkey of Alt+X to exit the app.) Change its Name to “btnExit”.
Now – double-click the Product Inventory button. This will open up your code window to a new function called “btnProductInventory_Click()”. We’re going to add the following code inside the curly braces of the function:
var ProductInventoryForm = new frmProductInventory();
ProductInventoryForm.Show();
Save that, go back to the frmMain design view and double-click the “Exit” button. This will open up your code to a new function called “btnExit_Click()”. Add the following lines of code inside the curly braces of the function:
Application.Exit();
Save everything and start the app. You should now have a functioning form that will let you open a basic data entry grid for a table with lookups for the ID values. You’ll need to click the built-in “save” button to save your changes as this is a pretty basic app, but it should suffice for really basic use cases.
I was having some issues when trying to close this form after adding new data. I ended up just throwing a basic DataError event handler with no code on the data grid view. You can do this by select the data grid on the Product Inventory form in design mode, then going to the Properties window, but click the lightning bolt icon to bring up Events. Look for the “DataError” event under Behavior. Click the drop-down there and you’ll be taken to a new function to handle DataError events. I just left it as-is, saved, and re-ran. The form now closes without any issues. Without that, it would complain that a combobox wasn’t bound properly and throw errors for every Location. With the basic catch, it just closes the window as expected.
I’m aware this isn’t best practices, but it worked for this basic case.
In conclusion, we now have a really, really basic data entry app using data grids and C#. I know this isn’t following a whole lot of best practices, but for someone who doesn’t know much C# it gets the job done. I’m open to feedback on better (but still easy) ways to do this and if I’m doing something that is just wrong, please let me know.




Hello
I found this post really something which i would want.
I would like to develop something similar to this in an access database. i would like to use c# and access for this.
Before i used to capture data in excel sheets and it took lot of work as i have to manually check for errors and update sheets and import it into access. Could you please provide me the code for this? in the post you have mentioned you worked with access and c#. if you have that available could you please share it with me ? Thanks so much
I’m afraid I don’t have any examples for Access. The concept would be similar in that you’d link tables and use lookups for the other tables. I’ve done that in the past, but the problem with Access is that it requires the end-users to have a copy of it or the runtime and that’s often more trouble than it’s worth in larger companies. I wanted to write up a very simple stand-alone app that could do basic data maintenance so chose to try this out.
It’s by no means the best way, but it is _a_ way. If you have the time/ability, writing up a modern app using just C# would probably be the better option. If you want to use just Access, I know there are good books and tutorials out there to show you how to work with other data sources with Access as a front-end.
Thanks so much for the reply!
could you please guide me on how can i set up a combobox in a datagridview which has predefined values, to accept new values from user and add it to list of values in that combobox?
Anna, that’s going to be a little beyond me, but I’m sure there are tutorials out there that deal with that more specifically. I think I had just set up a separate maintenance screen to do that. My main goal in this case was to just get something quick working so people could work with the sample data.
I _know_ that I’ve seen examples of this with Access as the front-end before, but I haven’t really used Access in many years now.
no problem paschott.. was wondering if you had some handy codes in some posts you have written.. Thanks !